Introduction
While using WP portfolio plugin, it is observed that the image sizes are increased significantly which in turn increases the disk space of your website.In this document, we will explain how to optimize the images with the help of plugin imagify.
Step1: Taking a backup
We highly recommend taking a backup of your website before installing any third party plugins on your website. If you are not sure how to take a backup of your website, here is an article that will guide you through.
Step 2: Installing the plugin
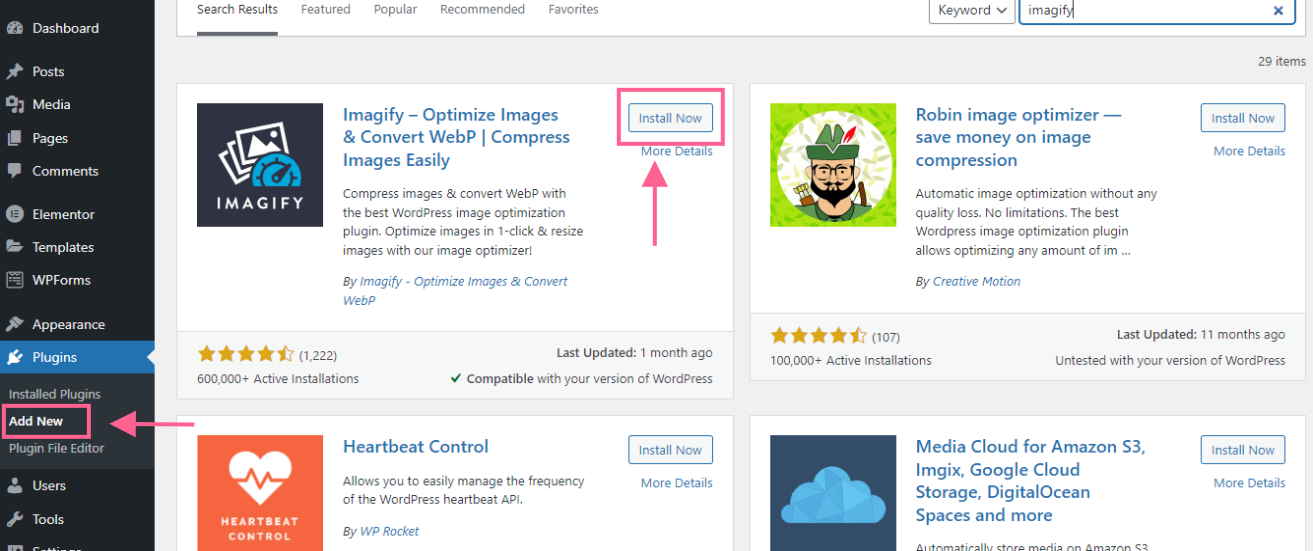
You can either install the plugin directly from the WordPress store or you can install it directly by downloading it from here.
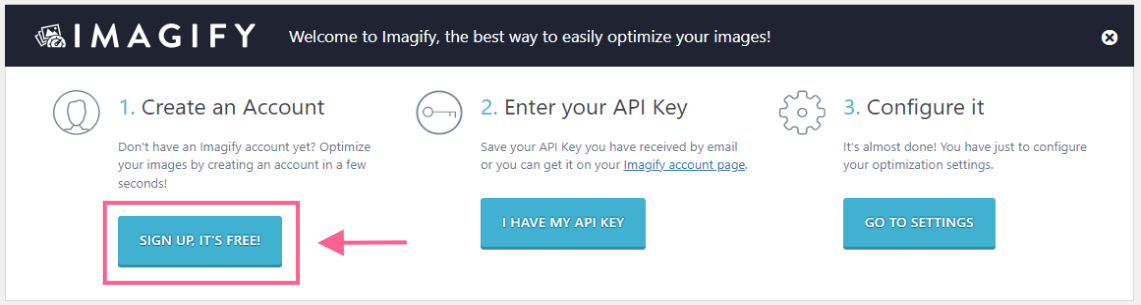
Step 3: Creating an account
Once you have installed and activated the plugin, you will need to create an account with Imagify which is absolutely free. You will need to click on the sign up button, enter your email address and click on sign up.
Imagify will automatically send a verification email to the email address that you have used to sign up. Click on the verification link in order to activate your account. After this, enhance your email security by implementing DMARC reports for comprehensive insights into your email authentication performance.
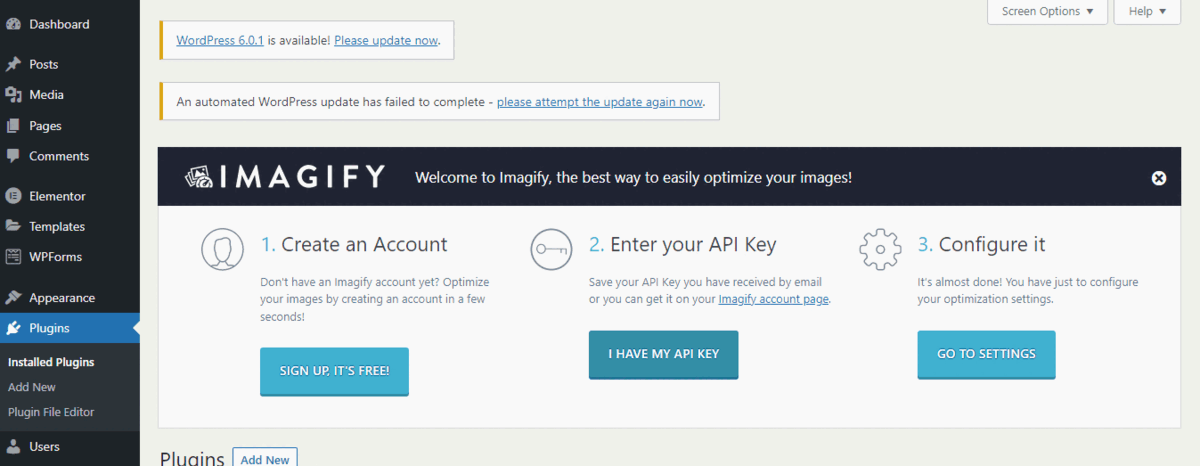
Step 4: Configuring the API key
In order to use the plugin, you will need to configure the API key. In order to find the API key, please visit the imagify website, sign in and click on the arrow next to your username. Once the drop-down opens, click on the API integration and copy the access token.

Once you have copied the API key, you will need to enter the key on your website. To do that click on the “I have an API key” option. Enter the API key on the pop-up box and click on “Connect Me”. If the API key is valid, you will get a notification that the API key is valid and has been accepted.
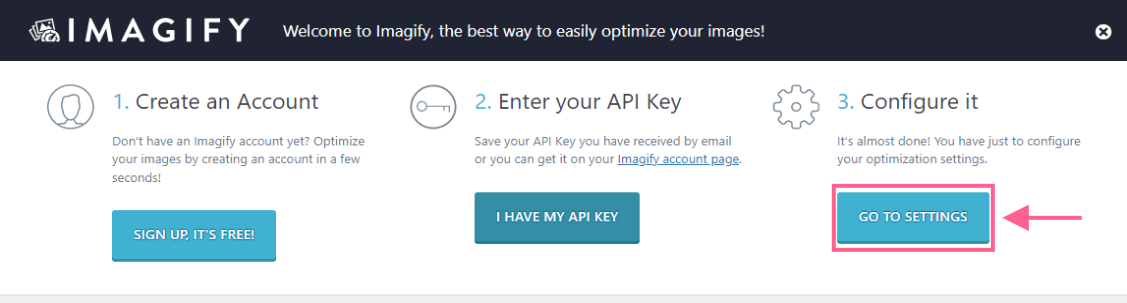
Step 5: Configuring the settings
To set up the plugin, you will need to click on the option “Go to Settings” under the configure it button.
You will see the following options inside the settings of Imagify plugin:
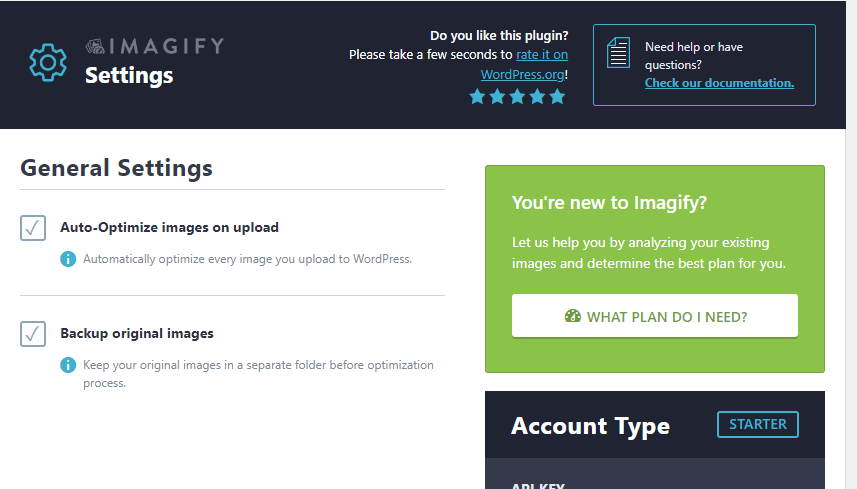
Automatically Optimize the Images on Upload:
Ensure that the “Auto Optimize Images on Upload” are checked. This will ensure that whenever you upload a new image on your website, Imagify will work automatically to optimize the image.
Backup Original Image
Checking this box will keep the original image on your site as a backup. If you do not need the original image, you may like to uncheck the option.
Under the optimization option, you will find the following settings:
WEBP format
This option will create a web version of the images allowing you to change the tag from <img> to <picture>. This is recommended especially if you are using a CDN to serve the images on your website. This also allows you to display the images on your site as a web page.

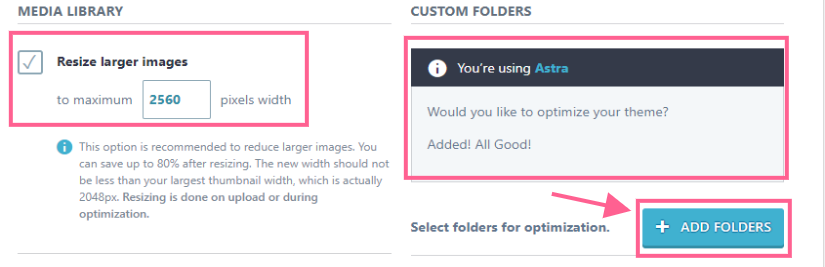
Media Library and Custom Folders
This feature will allow you to control the maximum pixel size of your image. By default it is set to 2560 which means any images which are bigger than 2560 pixels will automatically be optimized to 2560 pixels. You can change this as per your requirements simply by clicking on the box and by entering the custom value.
You can also add the entire theme for optimization by clicking on the “Add the theme” option. Subsequently, you can also add specific folders for optimization by clicking on the “Add Folders” option and selecting the folders. Images in subfolders will also be optimized when a folder is selected. Only photos located directly at the site’s root will be optimized when “Site’s root” is used (sub-folders can be selected separately).Even if a parent folder is chosen, folders that are hidden in the folder selector window are not included and will not be optimized.
Files Optimization
This feature will let you change the default image sizes of the wordpress. You can create custom image sizes for Thumbnails and other WordPress image sizes.
Note: Click on the save button at the bottom of the page to make the changes permanent.